by John Kendall
My friend bought this kit several weeks ago. First impression was the kit is very finely moulded, but I had to do a double take upon seeing a pair of plastic dummy wheels with flats. These were intended for the center axle and my reaction was "not on your life". In retrospect, I think Chivers should be credited with providing a method whereby even the greenest novice can produce a working vehicle. Issues with 6wheels are well known and the Dapol Stove R has certainly come in for it's share of stick (see my post about how I fixed mine).
My approach to the underframe (which is my brief, my friend will complete the van) was to use the following:
Bill Bedford spung W irons available from Eileen's Emporium
http://www.eileensemporium.com/index.php?page=shop.product_details&flypage=eny_fly_default.tpl&product_id=5879&category_id=288&option=com_virtuemart&Itemid=9
Bachmann 14mm plain coach wheels
Crank from a wagon brake fret
The outer axles were fixed and the center axle allowed to slide laterally.
A note on brake yokes. The W iron fret contains these and I did try to fit them. I found though, that the 00 back to back meant that the yoke fouled the wheel rim.
Here are pictures of the finished underframe:
A slight problem was encountered with the center axle being constrained by a safety loop. This was corrected by tweaking one slightly.
Revision 11 Dec 2011
The van is complete and I took it round to the club last night. I am delighted to report that it performed superbly. I had it going back and forth through pointwork, even slips and it never faltered.
Here's a picture of the finished article:
20 March 2012
The picture above shows the van in a slightly drunken posture, which I only noticed after the article was published. I found later that paint had fouled the spring mechanism. After cleaning, the van rides properly.
Tuesday, November 29, 2011
Monday, October 17, 2011
Progress at Allingham - Backscenes
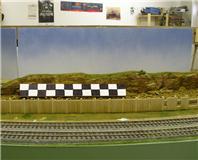
We exhibited our 00 layout Allingham at Ottawa Railfair this past weekend. The new backscenes were debuted:
The backscenes are, of course, from the Townscenes range. I have long been an admirer of these and this is not the first time I have used them. We dithered for a long time on a decision for backscenes but I am not aware of a better product for the urban scene we have here.
I wanted to do something special. Users of Townscenes will be aware of the recommendation to mount buildings on card to give a 3D effect. I mounted my buildings on foam core using brick paper to wrap the sides. Here's a useful site for brickpaper:
http://paperbrick.co.uk/index.php?action=selectbrick
I also used 2mm card in some cases to give the roof a pitch.
I fabricated chimneys by wrapping paper around 1/4" balsa or birchwood. Chimney top is a bit of card and chimney pots are from various sources including Wills, Dart Castings and Plastic tube.
Shortly after the show opened, there was a run on Townscenes at British Connection - the proprietors were very happy with us.
You may note the fine looking signals. These were built by one of our members and painted by another - still a bit more work to do. These incorporate solenoids for actuation and plug into the board for transport. In the next while a control panel will be wired up so that the next time we exhibit (GBTS in Brampton ON in April 2012), the signals will operate. We had a demo the other week and I was pleased to see that the arms do bounce.
Cheers
John
Sunday, September 18, 2011
Sunday, September 4, 2011
Simple Gutters
I think I lost count of the number of model buildings, primarily Metcalfe and Superquik, that don't have gutters (or downspouts, but that's a subject for another blog). This is another bugbear of mine, among many.
As I'm currently constructing a building (more of that in a later blog), I thought I'd share a simple method of making gutters. You can buy the Wills and Ratio building packs but I've found that you are frequently left with parts you don't need after using the gutters.
Think of a real building, there's a roof which usually overlaps the wall. A soffit and the gutter. You can very quickly and cheaply make these out of Evergreen Plastic Strip. Here's how:
Before adding the roof, glue the 0.080 x 0.080 strip along the top of the wall. If your building is card contact cement or superglue should work. You'll need to decide what's best for you. I'm working in plastic.
The strip will need to be beveled to match the contour of the roof. For card buildings you might find it better to do this before gluing it to the wall. You could do this if you are upgrading an existing building.
Take the 0.015 x 0.188 strip and 0.100 half round and glue them together. This gives you a gluing strip to firmly attach it to the building. If you are adding downspouts, drill for these before gluing the gutters to the building.
It's the little details that set our models apart from the rest.
Wednesday, August 24, 2011
New Videos
Lots of videos of the Exporail Exhibition last weekend at our website video page http://bmrcm.org/the-video-page
Friday, August 19, 2011
Exporail at the Museum this Weekend!!
Don't forget this weekend!!!!! We'll have our large exhibition layout up and operating at the museum so come and say hello!!!
August 20 and 21
A great passion for small trains
Admire the display of model train layouts built by railroaders from Quebec and Ontario.
Friday, August 5, 2011
Stove R from Hornby Magazine and Dapol
by John Kendall
This model has received some sharp criticism since its release. As far as I can tell from consulting some LMS coach literature the upperworks are correct. It is in the underframe where trouble starts. The running gear seems to be nothing but compromise. I have read that the coach won't stay on the track, particularly through points. Wheels are undersize (at 12mm dia, should be 14mm) and flanges are grossly deep. Brake shoes are miles away from the wheels. It isn't easy to replace the wheels since the wheel mounts are fairly thick plastic and you would have to grind through the bridge from pivot to W iron quite drastically to give 14mm wheels clearance.
I chose to scrap the wheel mounts and replace them with components from Comet Models. I got the C7 W Iron pack (enough for 3 sets) and C14 Clasp Brakes. I reused the plastic axleboxes but in hindsight I wish I had used the Comet cast ones (C17).
Fitting these wasn't easy but after several tries I managed to get all wheelsets at the same height.
There is a LOT of fragile detail, much of it came to grief as I was working on the coach but I was able to repair using lashings of superglue.
I have run the coach on Allingham and it seems to be OK although I must admit I haven't subjected it to any serious shunting.
This picture shows the coach after weathering:
Revision 1 Sept 2011
I took the opportunity the other night (while my power was off due to Irene) to visit my friend. I built his layout and he too has the Dapol Stove R. I wanted to see if my all singing and all dancing Stove R would negotiate small (A5ish) finescale pointwork (PECO and handbuilt)so this was an ideal opportunity. I'm happy to report that it passed with flying colours. The same couldn't be said for my friends example however. Despite fitting it with finescale (3 hole disc) 12mm wheels it appeared to rock on the center axle and was not happy going through points.
Said Stove R is now at my house with stern instructions to fix it.
Edit for 29 Nov 2011
I thought I'd add a picture of the underneath of the Stove R:
Lamps on Goods Brake Vans
by John Kendall
I wanted to give everyone the benefit of some research I did recently about lamps. This came about after a friend of mine took me to task for brake lamps on one of my brake vans.
It turns out that brake vans on main lines were required to carry 3 lamps. One in the center and 2 side lamps. For single track branches and double track mainline, these were red facing the rear. Less strictly, it seems, the side lamps were supposed to show white towards the front so the crew could confirm the train was intact.
This picture shows what I mean (OK, the center lamp lost its jewel when I was mounting it, I'll have to paint it red):
For multiple track main lines, for trains on the slow line, there was supposed to be a white rear facing lamp on the side of the brake nearest the fast line. The position of this white lamp was such that the crew of a train approaching from behind could tell which line the train ahead was on. Trains on the fast line carried 3 red lamps.
For goods or loop lines, one red lamp was required.
Allingham has a double track main line and will have a branch line. So, as near as I can tell brake vans on the layout should have lamps as shown.
The guys at the Solihull Model Railway Circle provided me with the info. I just modified the van.
MARK FINDLAY, FORMER BR GUARD, has kindly provided his recollections:
Partially or unfitted trains:
These have a brake van at the rear, and always have 3 lamps on the running line, regardless of the type. The tail lamp just shows red to the rear, as is obvious. The side lamps show white forwards at all times (on main lines) at both sides (and the driver would look out of these to help him see if the train was complete). The side lamps show red to the rear on main lines, but they were adjustable in that they had a removable red slide. When the train was in a loop, this would be removed to show white to the rear on the side nearest the running line. This indicated to the driver of any train on the main line that the freight train was inside the loop clear. My memory fails me a bit on the case when on the slow lines of a four-track line, but I think if the train was on a running line, 3 reds would continue to be shown; however other accounts don’t mention this.
Some accounts mentioning showing just 2 red lights in some circumstances, but this did not happen in my day.
Side lamps were always to be removed when going into sidings other than recess.
Tail lamps were always painted white; side lamps either black or white.
Fully fitted trains, including parcel trains where no passengers are carried:
Just one tail lamp shown.
The guard would always ride in the rear cab of the locomotive except for nuclear flasks, where the guard rode in a fitted brake (usually piped only) behind the train, with a barrier vehicle between the van and the flask vehicle. Another barrier would be present between the flask vehicle and the loco (these requirements no longer exist, I believe.) No brake vans or barrier vans are required nowadays.
Passenger and ECS:
In my day, all showed a separate oil tail lamp, even DMUs, except for HSTs with their own high intensity lamps. This requirement was removed for DMUs, which had their own built in rather dim red lamps.
The rule is quoted here:
7.4 Side Lamps
7.4.1 Guards of freight trains not fitted throughout with the automatic brake must ensure that in addition to the train tail lamp, two side lamps are carried on the rearmost brakevan. After sunset or during fog or falling snow they must show a white light forward , but the indication to the rear must be as follows:-
a). On main lines,fast lines and single lines- two red lights.
b ). On slow lines,relief lines or loops adjoining main or fast lines and running in the same direction- one red light on the side furthest away from the main or fast line and one white light on the side nearest the main or fast line.
c). On goods lines or loops adjoining slow or relief lines and running in the same direction - two red lights.
d). On reception sidings - the side lights must be removed or obscured when the train has passed into the sidings.
The above just refers to the sidelights and the aspect to be shown to the rear.. the main red tail light in the centre of the van would remain illuminated all the time of course...The reason for changing the aspects shown to the rear was to avoid confusing a following train or one passing a freight on a slow line or in a loop. The reason for showing white lights forward was to indicate to the loco crew on an unfitted train that the train was still intact and following.
Thanks to Mark for this information.
Tuesday, August 2, 2011
Re-using Lifted RTR Points
By John Kendall
In my experience it is extremely difficult to remove ballasted track so that it can be reused. I wouldn't re-use any of the track I lifted from my last layout. Best to plan and budget for new track when contemplating a new layout or refurbishment of an existing I think.
I feel strongly that lifting RTR points for re-use is a non-starter. However, an idea I hit on (and I'm sure I'm not the only one) is to remanufacture, say, used PECO points. When lifting the point, the timbers get distorted (but not so it is obvious to the naked eye) so that when relaid, rail vehicles frequently derail. I decided to take old code 100 points, strip them down and rebuild. The stock rails, closure rails and blades are fine. You have to make the common crossings though. Print the PECO point template available on the PECO website (http://www.peco-uk.com/page.asp?id=pointplans) and tape it to a flat surface. Cut copper clad timbers to length and stick these to the template with cheap double sided sellotape.
Now solder the rails and crossing using handmade point principles (Great care must be taken at the "frog" to ensure that the crossing is correctly aligned for both routes. This takes a bit of practice).
Some good sources for this:
1) An Approach to Finescale Track by Iain Rice. Not only does this work provide instruction on how to make points but also a very entertaining history of trackwork.
2) Trax2, comes as a book with CD that lets you print point templates. The book provides step by step instruction on construction of various points.
3) Right Track 10, Terrific Trackwork from BRM. Hosted by Tony Wright with instruction by Norman Solomon.
Read, watch, listen and then do. You will probably find that some techniques work for you while others don't.
Another source for the very ambitious is Templot:
http://www.templot.com/
Another thing I would recommend is that you use the Carrs solders and fluxes. You may get away with electrical solder but I find the 145C solder and green flux to be my preferred medium. (http://www.finescale.org.uk/index.php?option=com_virtuemart&Itemid=56)
The great thing is that you already have the rebate for the blade on the stock rails and the blades pre-made. Making blades is probably the most time comsuming job when building points. The other advantage of course is that you save money by not having to buy new points and furthermore you've stretched your modelling skills as well.
There is one other advantage, you can make the point to any radius you want - I used Trax2 for the templates for this. PECO points have enormous gaps between blade and rail, when you remanufacture, this gap can be reduced. A word of caution - if you use solenoid type point motors (and we used SEEP) be careful not to reduce the throw such that the microswitch or aux switch for frog polarity fails to make. Tortoise type point motors are probably a better choice.
This approach was very successful for Allingham and you can see some of the handmade points in the pictures. I was particularly pleased with the double slip.
In my experience it is extremely difficult to remove ballasted track so that it can be reused. I wouldn't re-use any of the track I lifted from my last layout. Best to plan and budget for new track when contemplating a new layout or refurbishment of an existing I think.
I feel strongly that lifting RTR points for re-use is a non-starter. However, an idea I hit on (and I'm sure I'm not the only one) is to remanufacture, say, used PECO points. When lifting the point, the timbers get distorted (but not so it is obvious to the naked eye) so that when relaid, rail vehicles frequently derail. I decided to take old code 100 points, strip them down and rebuild. The stock rails, closure rails and blades are fine. You have to make the common crossings though. Print the PECO point template available on the PECO website (http://www.peco-uk.com/page.asp?id=pointplans) and tape it to a flat surface. Cut copper clad timbers to length and stick these to the template with cheap double sided sellotape.
Now solder the rails and crossing using handmade point principles (Great care must be taken at the "frog" to ensure that the crossing is correctly aligned for both routes. This takes a bit of practice).
Some good sources for this:
1) An Approach to Finescale Track by Iain Rice. Not only does this work provide instruction on how to make points but also a very entertaining history of trackwork.
2) Trax2, comes as a book with CD that lets you print point templates. The book provides step by step instruction on construction of various points.
3) Right Track 10, Terrific Trackwork from BRM. Hosted by Tony Wright with instruction by Norman Solomon.
Read, watch, listen and then do. You will probably find that some techniques work for you while others don't.
Another source for the very ambitious is Templot:
http://www.templot.com/
Another thing I would recommend is that you use the Carrs solders and fluxes. You may get away with electrical solder but I find the 145C solder and green flux to be my preferred medium. (http://www.finescale.org.uk/index.php?option=com_virtuemart&Itemid=56)
The great thing is that you already have the rebate for the blade on the stock rails and the blades pre-made. Making blades is probably the most time comsuming job when building points. The other advantage of course is that you save money by not having to buy new points and furthermore you've stretched your modelling skills as well.
There is one other advantage, you can make the point to any radius you want - I used Trax2 for the templates for this. PECO points have enormous gaps between blade and rail, when you remanufacture, this gap can be reduced. A word of caution - if you use solenoid type point motors (and we used SEEP) be careful not to reduce the throw such that the microswitch or aux switch for frog polarity fails to make. Tortoise type point motors are probably a better choice.
This approach was very successful for Allingham and you can see some of the handmade points in the pictures. I was particularly pleased with the double slip.
Thursday, July 28, 2011
Private Owner Wagons post Nationalisation
by John Kendall
Students of British Railways history will be aware that in 1939, all the Private Owner wagons (with some exceptions) were pooled under government control for the duration of the war. The idea in 1939 was that the wagons would be returned to their owners at the end of hostilities - this never happened.
In 1948 the nascent nationalised British Railways inherited a hodge podge of rolling stock from the 4 big companies (LMS, GWR, SR and LNER) plus the PO wagons. Now, much of this was antiquated and had been poorly maintained during the war. However, BR was in no position to scrap vehicles wholesale so had to make do with what they had - at least for the time being.
So, here's my beef. I frequently see pristine PO wagons hauled by BR locos on layouts at exhibitions. This can be corrected. First of all, as I said above, after the war they were in dreadful shape. Second, the concept of Privately Owned wagons had gone by the board in 1939, so there was no need to maintain their identity. Third, BR tried to standardise the identity and marking of all their wagons. Therefore, PO wagons in BR ownership received numbers prefixed by "P" on sloppily painted black panels in the corners of the wagons. Those wagons with end doors also received a white stripe. My source for the appearance of the wagons is "The 4mm Coal Wagon" by John Hayes (Wildswan).
The markings can be acheived easily by using the excellent range of ModelMaster decals. Heavy weathering is in order as well. Certainly by the early 1960s, the previous identity of the surviving wagons (and few were left by then) would have all but disappeared.
Here are three I did:
The two on the right are Bachmann. The Great Mountain wagon is possibly a kit - it is riding on a PECO chassis.
The video above shows a mineral train running with a collection of ex PO and BR standard wagons. While most BR wagons look very similar there were a large number of variations. In the train most of the wagons are unique types.
Friday, July 22, 2011
Coach Corridor Connections and Couplings
One of the things that really bothers me when viewing a passenger train is that most of the time one sees a great deal of daylight between coaches. Another issue is that coaches out of the box have couplings that make the coaches way too far apart. I'll discuss simple ways to improve matters.
These are some Mk 1s I improved (well, I think I did).
Making working corridor connections is not difficult, nor does it take a lot of time and you can use materials that are probably already to hand.
Materials:
Photocopy paper which is on the heavy side
0.020" Evergreen pastic sheet
Take the corridor connection off the coach to be treated and mark the dimensions of this on the paper:
Note there is a half line at the center of the corridor outline.
Cut the connections as shown. Use the back of an Xacto knife to score the fold lines:
Fold each piece and cut the half line in the center. Colour the paper black.
Now thread two connections together to obtain a concertina:
Make end/rubbing plates from the plastic sheet using the original coach corridor as a guide:
Glue the plates to the paper concertinas, and paint black:
The surface of the rubbing plates needs to be smooth since coaches negotiating points and curves have sliding contact at this location and any resistance will cause a derailment. Here's one I did earlier:
I should probably say that you can get the MJT design from Dart Castings. These come with white metal end plates and etched rubbing plates, as shown here.
Now, as to distance between coaches. If your coaches stay in more or less fixed rakes, ie. there is no coach shunting/marshalling on the layout, you can use something I learned from Tony Wright. This method is detailed in BRM's Right Track 4 DVD, "Detailing and Improving RTR". (By the way, these DVDs will play on my DVD player but not on my BlueRay).
The method involves:
1) removing the proprietary coupling system.
2) fixing copper clad strip behind the buffer beam. The surface of the strip should be flush with the buffer beam so will need shimming.
3) 0.45" nickel silver wire is soldered to the copper clad strip. On one end of the coach in a hook shape and on the other a loop.
These pictures illustrate what I mean:
Before painting, you will want to test the coupling on your layout. Check it through curves and points and especially check while propelling. If the coaches are too close for your layout, buffers will lock so its a simple matter of tweaking the distance of the hook from the bufferbeam until all is well. The loop should be in line with the buffer heads. For corridor coaches this is less critical since the working corridor described above will stop the coaches getting too close. For non-corridor coaches you might need to solder a piece of wire across the loop to prevent the buffers from getting too close:
This coupling method works very well and permits propelling. I put Kadees on the ends of coaches that will couple to the locomotive.
One other thing, if the coaches are quite close coupled, as mine are, you may find that there is a lot of pressure on the end plates. Too much pressure will reduce the ability to slide when going round curves and through points causing derailments.
The solution is make the corridor concertina only three corridor widths wide instead of four. When coupled there should be very little rubbing plate pressure while the corridors stay in contact.
Wednesday, July 20, 2011
4mm scale figures
I've noticed in many reviews of layouts that the very good Bachmann prepainted figures are frequently used. Most of the time these are used straight out of the box and, in this condition, to me, thay are flat and lifeless.
These are some figures I had lying around:
You can see that the figures lack shadows etc.
In addition to Bachmann, Woodland Scenics figures are excellent, Model Scene not so much. I've found that a very simple way to bring these to life is to apply a black wash (very thin acrylic paint). Dab the excess paint with a paper towel. The paint will be held in the crevices but flow off the smooth surfaces giving the impression of shadow lines and facial features.
Now this is very much a personal opinion thing. I think that the figures are improved. They will be at normal viewing distances on the layout and, like many things in model railways, we strive for the "impression" of realism.
Tuesday, July 19, 2011
A Short Video
This is a short video clip of our club layout, Allingham.
Shot by John Kendall on June 19' 2011
Monday, July 18, 2011
Signals
N Class 31860 passes the loco shed at Allingham |
Long-time club member David Tozer has been building operating signals for our layout, Allingham. They can be seen in the following photos. They are made from brass stock and are operational....they still need to be painted and then, during the coming weeks they will be wired into the layout.
Sunday, July 17, 2011
A great passion for small trains. Admire the display of model railways built by modellers from Quebec and Ontario.
The British Model Railway Club of Montreal will be exhibiting the larger of our two DCC equipped layouts, Allingham, at Exporail at the Montreal Railway Museum at Delson during the weekend of this August 20-21. Please join us there and see some great model railways alongside the real thing.