Monday, October 17, 2011

Progress at Allingham - Backscenes

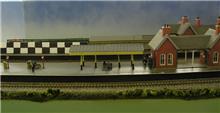
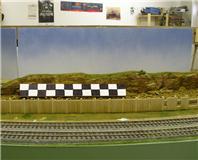
We exhibited our 00 layout Allingham at Ottawa Railfair this past weekend.  The new backscenes were debuted:


The backscenes are, of course, from the Townscenes range.  I have long been an admirer of these and this is not the first time I have used them.  We dithered for a long time on a decision for backscenes but I am not aware of a better product for the urban scene we have here.

I wanted to do something special.  Users of Townscenes will be aware of the recommendation to mount buildings on card to give a 3D effect.  I mounted my buildings on foam core using brick paper to wrap the sides.  Here's a useful site for brickpaper:

http://paperbrick.co.uk/index.php?action=selectbrick

I also used 2mm card in some cases to give the roof a pitch.

I fabricated chimneys by wrapping paper around 1/4" balsa or birchwood.  Chimney top is a bit of card and chimney pots are from various sources including Wills, Dart Castings and Plastic tube.

Shortly after the show opened, there was a run on Townscenes at British Connection - the proprietors were very happy with us. 

You may note the fine looking signals.  These were built by one of our members and painted by another - still a bit more work to do.  These incorporate solenoids for actuation and plug into the board for transport.  In the next while a control panel will be wired up so that the next time we exhibit (GBTS in Brampton ON in April 2012), the signals will operate.  We had a demo the other week and I was pleased to see that the arms do bounce.

Cheers

John

Sunday, September 18, 2011

Preliminary work on the back scenes for the clubs' exhibition layout, Allingham, has been started by club-member John Kendall...well done John!


Sunday, September 4, 2011

Simple Gutters

I think I lost count of the number of model buildings, primarily Metcalfe and Superquik, that don't have gutters (or downspouts, but that's a subject for another blog). This is another bugbear of mine, among many.

As I'm currently constructing a building (more of that in a later blog), I thought I'd share a simple method of making gutters. You can buy the Wills and Ratio building packs but I've found that you are frequently left with parts you don't need after using the gutters.

Think of a real building, there's a roof which usually overlaps the wall. A soffit and the gutter. You can very quickly and cheaply make these out of Evergreen Plastic Strip. Here's how:


Before adding the roof, glue the 0.080 x 0.080 strip along the top of the wall. If your building is card contact cement or superglue should work. You'll need to decide what's best for you. I'm working in plastic.

The strip will need to be beveled to match the contour of the roof. For card buildings you might find it better to do this before gluing it to the wall. You could do this if you are upgrading an existing building.

Take the 0.015 x 0.188 strip and 0.100 half round and glue them together. This gives you a gluing strip to firmly attach it to the building. If you are adding downspouts, drill for these before gluing the gutters to the building.

It's the little details that set our models apart from the rest.

Wednesday, August 24, 2011

New Videos

Lots of videos of the Exporail Exhibition last weekend at our website video page http://bmrcm.org/the-video-page

Friday, August 19, 2011

Exporail at the Museum this Weekend!!


Don't forget this weekend!!!!!  We'll have our large exhibition layout up and operating at the museum so come and say hello!!!
     http://www.exporail.org/public/en/1_montezabord/default.asp

August 20 and 21
A great passion for small trains
Admire the display of model train layouts built by railroaders from Quebec and Ontario.

Friday, August 5, 2011

Stove R from Hornby Magazine and Dapol

by John Kendall

This model has received some sharp criticism since its release. As far as I can tell from consulting some LMS coach literature the upperworks are correct. It is in the underframe where trouble starts. The running gear seems to be nothing but compromise. I have read that the coach won't stay on the track, particularly through points. Wheels are undersize (at 12mm dia, should be 14mm) and flanges are grossly deep. Brake shoes are miles away from the wheels. It isn't easy to replace the wheels since the wheel mounts are fairly thick plastic and you would have to grind through the bridge from pivot to W iron quite drastically to give 14mm wheels clearance.

I chose to scrap the wheel mounts and replace them with components from Comet Models. I got the C7 W Iron pack (enough for 3 sets) and C14 Clasp Brakes. I reused the plastic axleboxes but in hindsight I wish I had used the Comet cast ones (C17).

Fitting these wasn't easy but after several tries I managed to get all wheelsets at the same height.

There is a LOT of fragile detail, much of it came to grief as I was working on the coach but I was able to repair using lashings of superglue.

I have run the coach on Allingham and it seems to be OK although I must admit I haven't subjected it to any serious shunting.

This picture shows the coach after weathering:


Revision 1 Sept 2011

I took the opportunity the other night (while my power was off due to Irene) to visit my friend. I built his layout and he too has the Dapol Stove R. I wanted to see if my all singing and all dancing Stove R would negotiate small (A5ish) finescale pointwork (PECO and handbuilt)so this was an ideal opportunity. I'm happy to report that it passed with flying colours. The same couldn't be said for my friends example however. Despite fitting it with finescale (3 hole disc) 12mm wheels it appeared to rock on the center axle and was not happy going through points.

Said Stove R is now at my house with stern instructions to fix it.

Edit for 29 Nov 2011

I thought I'd add a picture of the underneath of the Stove R:

Lamps on Goods Brake Vans

by John Kendall

I wanted to give everyone the benefit of some research I did recently about lamps. This came about after a friend of mine took me to task for brake lamps on one of my brake vans.

It turns out that brake vans on main lines were required to carry 3 lamps. One in the center and 2 side lamps. For single track branches and double track mainline, these were red facing the rear. Less strictly, it seems, the side lamps were supposed to show white towards the front so the crew could confirm the train was intact.

This picture shows what I mean (OK, the center lamp lost its jewel when I was mounting it, I'll have to paint it red):


For multiple track main lines, for trains on the slow line, there was supposed to be a white rear facing lamp on the side of the brake nearest the fast line. The position of this white lamp was such that the crew of a train approaching from behind could tell which line the train ahead was on. Trains on the fast line carried 3 red lamps.

For goods or loop lines, one red lamp was required.

Allingham has a double track main line and will have a branch line. So, as near as I can tell brake vans on the layout should have lamps as shown.

The guys at the Solihull Model Railway Circle provided me with the info. I just modified the van.

MARK FINDLAY, FORMER BR GUARD, has kindly provided his recollections:

Partially or unfitted trains:

These have a brake van at the rear, and always have 3 lamps on the running line, regardless of the type. The tail lamp just shows red to the rear, as is obvious. The side lamps show white forwards at all times (on main lines) at both sides (and the driver would look out of these to help him see if the train was complete). The side lamps show red to the rear on main lines, but they were adjustable in that they had a removable red slide. When the train was in a loop, this would be removed to show white to the rear on the side nearest the running line. This indicated to the driver of any train on the main line that the freight train was inside the loop clear. My memory fails me a bit on the case when on the slow lines of a four-track line, but I think if the train was on a running line, 3 reds would continue to be shown; however other accounts don’t mention this.

Some accounts mentioning showing just 2 red lights in some circumstances, but this did not happen in my day.

Side lamps were always to be removed when going into sidings other than recess.

Tail lamps were always painted white; side lamps either black or white.

Fully fitted trains, including parcel trains where no passengers are carried:
Just one tail lamp shown.
The guard would always ride in the rear cab of the locomotive except for nuclear flasks, where the guard rode in a fitted brake (usually piped only) behind the train, with a barrier vehicle between the van and the flask vehicle. Another barrier would be present between the flask vehicle and the loco (these requirements no longer exist, I believe.) No brake vans or barrier vans are required nowadays.

Passenger and ECS:

In my day, all showed a separate oil tail lamp, even DMUs, except for HSTs with their own high intensity lamps. This requirement was removed for DMUs, which had their own built in rather dim red lamps.

The rule is quoted here:

7.4 Side Lamps

7.4.1 Guards of freight trains not fitted throughout with the automatic brake must ensure that in addition to the train tail lamp, two side lamps are carried on the rearmost brakevan. After sunset or during fog or falling snow they must show a white light forward , but the indication to the rear must be as follows:-

a). On main lines,fast lines and single lines- two red lights.
b ). On slow lines,relief lines or loops adjoining main or fast lines and running in the same direction- one red light on the side furthest away from the main or fast line and one white light on the side nearest the main or fast line.
c). On goods lines or loops adjoining slow or relief lines and running in the same direction - two red lights.
d). On reception sidings - the side lights must be removed or obscured when the train has passed into the sidings.

The above just refers to the sidelights and the aspect to be shown to the rear.. the main red tail light in the centre of the van would remain illuminated all the time of course...The reason for changing the aspects shown to the rear was to avoid confusing a following train or one passing a freight on a slow line or in a loop. The reason for showing white lights forward was to indicate to the loco crew on an unfitted train that the train was still intact and following.

Thanks to Mark for this information.