You can also read a review in the July 2011 edition of British Railway Modelling, so I won't spend time going over general construction. The recommended glue is Aliphatic Resin (in it's basic form this is Lepages Yellow Carpenter's Glue). It comes in smallish bottles, similar to those used for cyano, but it seems to be unheard of here. I used cyano, contact cement, PVA and Yellow glue as the need presented itself.

Opening the box:
Wow! Loads of beautifully cut birchwood ply pieces. Windows and doors come in for particular praise. However, upon examination of the main walls I was dismayed to find that they are butt jointed and thus lose the brick detail at the ends. The same issue is evident with the chimneys. I had to sit and think for a few minutes. My decision was to reproduce the walls out of plastic card using the wooden pieces as templates. My philosophy is to make a decent model using the kit as an aid.
Making a start:
First order of business was to measure up and cut the walls to shape. Note: Door and window openings have to be cut 0.5mm wider on each side (I do this by eye). Offer up the windows and doors to make sure you are close to the right dimension. After that I glued on SE Finecast English Bond brick (Slaters works equally well). I then glued strips of brick down the edges of the doors and windows to try and give these an appearance of brick (hence the need to cut the apertures oversize).
Wall ends were bevelled 45 degrees(ish). When the strips mentioned above are dry, trim flush to the inner wall. Simply cut the window and door openings out now. Again offer up the doors and windows, slight sanding should get everything to fit. I added the lintels and sills at this point using cyano.
I spent quite a bit of time making a representation of the interior using floors and other details from Scalescenes Interior Elements kit: http://www.scalescenes.com/scratchbuilders-yard This is entirely optional.
Interior walls provided in the kit should be glued back to back.
The walls are glued together, made square and left to dry. Do ensure the walls are square otherwise the roof won't fit properly.
Painting:
Obviously painting is a crucial part of any kit. When I make a model, always in the back of my mind is...painting. The order of construction in many kits ignores the need to paint. I like to make subassemblies and paint these, avoiding hard to reach areas. You can go back later to touch up.
Walls: Before assembling together I start with a coat of red oxide car primer. Allow to dry then apply a thin wash of mortar colour (I used acrylic Concrete). After about an hour or so, get some ammonia based window cleaner and cotton swabs (applicable to acrylic paint). Dip the swabs in the cleaner and gently rub the walls to remove surface Concrete colour. The mortar course should remain concrete colour. Do this until you're happy. Don't rub too hard. Dry the walls and get your brick red colour. I simply added red to Tamiya Flat Brown. Dry brush the brick colour trying not to get it in the mortar courses. After this is dry, I lightly brushed some rust coloured powder on the walls. Finally, seal everything with matte varnish.
Windows: These are (in my mind) cream. I don't get all OCD about accurate colour and used PollyS D&RGW Cream. However, before applying the top colour, spray paint the windows (and doors) with flat white. This covers much better than brushed on white. When dry, the cream goes on very nicely.
Doors: These need to have the panels painted cream while the doors are chocolate brown (here I use Tamiya Flat Brown). Painted panels are a problem for me since no matter how hard I try, I can't seem to get a satisfactory result. In this case, however, I hit on a neat solution. The doors are thin enough that I was able to cut the panels out and paint the door. I then got a piece of pastic card and painted it cream, gluing it to the back of the door. Finally, I drilled a 0.020" hole, and bent some fine wire to make door handles.
Glazing: The supplied glazing will go straight on the backs of the doors and windows. It is covered with protective film. I cut mine to shape because of the interior. Best to follow the instructions here - I didn't.

Roof Trusses: These are explained in the BRM article. These fit very nicely. Lots of spare bits are supplied, some of which serve no obvious purpose (always worrying). I elected to stain the projecting rafters.
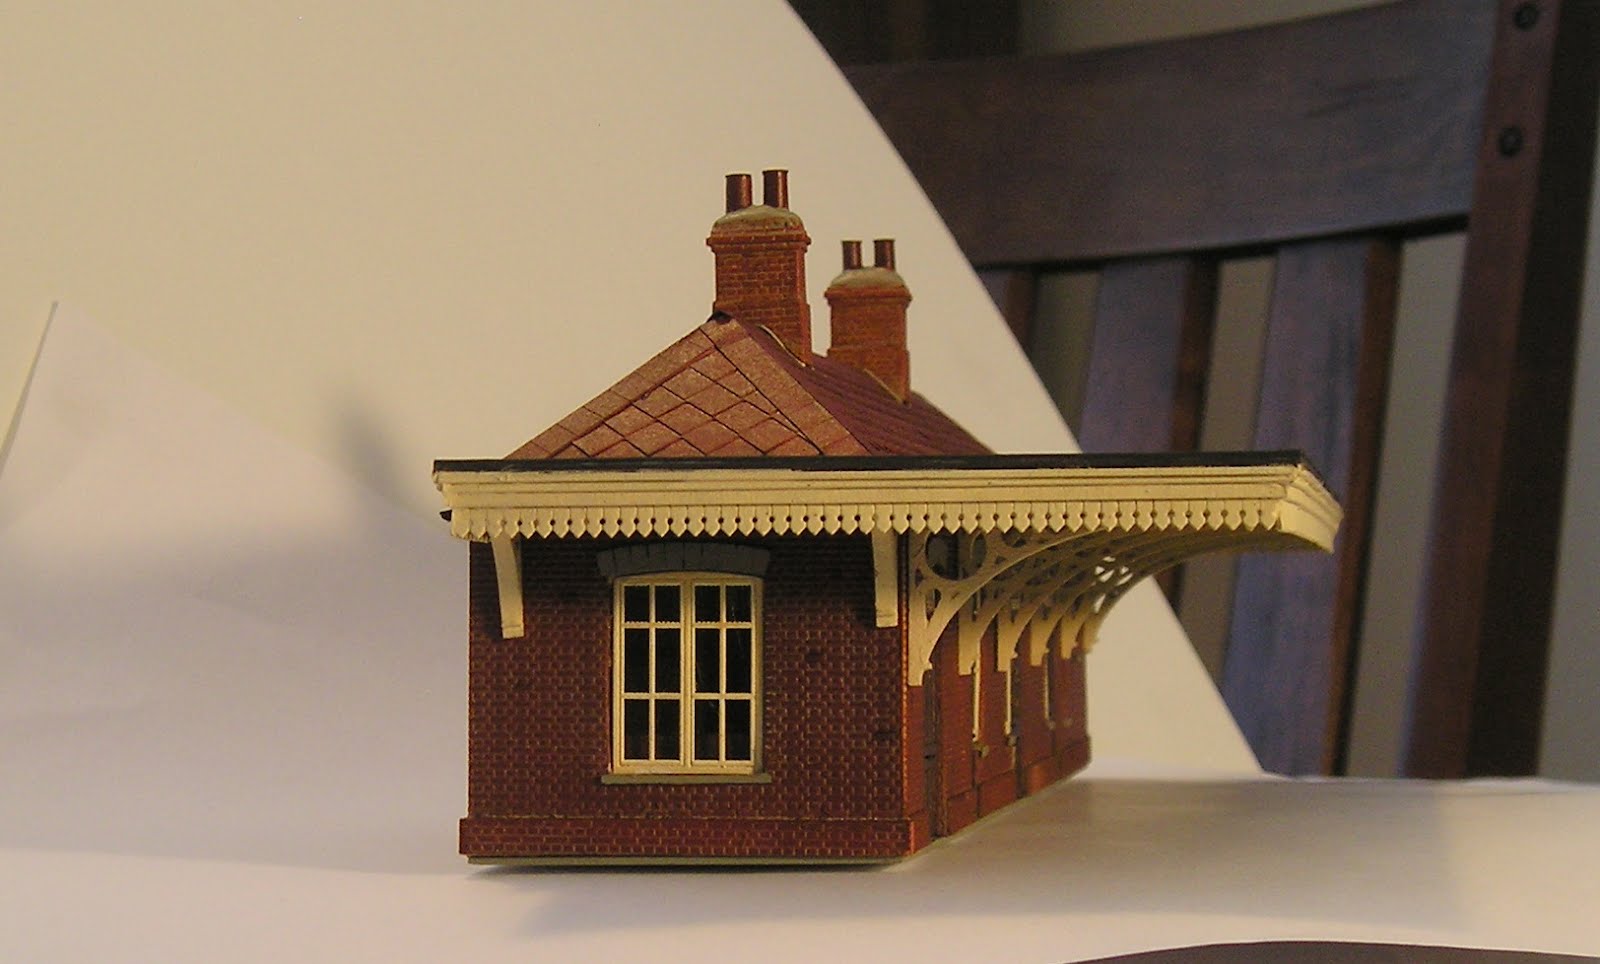
Canopy: Do a trial fit of this. If your main building isn't true, you will find out now. I used cyano to fix the ribs. The spacer tool is just a bit too wide since by the time I got to the end, my rib spacing was off quite a bit. I should have done some measuring. I sprayed the roof with grey car primer and then, when dry, painted it with PollyS Grimy Black.
Barge boards: These come on a "fret" with the layers. Again this is explained in the BRM article. Essentially start with the wider strips and glue these to the top of the bargeboard. Then, take the narrower strips and do the same.
Canopy assembly: Straightforward - glue the flat roof to the projecting rafters.
Main Roof: Four pieces of pre-cut plywood are supplied. These are cut slightly large so careful study and trimming is needed to get them to fit snugly. Finally sand the joints smooth.
Roof Tiles. Pre-cut paper tiles are provided. I used PVA in a jar with a small brush. Apply the PVA to the plywood and while the glue is wet, lay on a strip of the tiles. Let this dry for a few minutes. Proceed to the next strip orienting in accordance with the instructions. Don't rush. Finally apply the ridge tiles. Tip: make a small cut at each end of the ridge tile strip. Turn it over and, using the BACK of an exacto blade, score a line. This will make it easy to bend.
Main Roof Painting: I masked off the entire building. I used red oxide car primer on the roof. When dry, my brick colour was used.
Bargeboard Assembly: I had to think about this because the location of these is not obvious. A look at the photos on the site helped me to figure it out. Snip off about 4mm of each rafter, sand. The bargeboards are glued to the canopy flush with the edge of the canopy. Fitting needs to be done carefully. The corners need to be filed to a 45 deg. angle to make a crisp joint.
Chimneys: I assembled the wooden chimneys that were supplied but I was unhappy with them. I elected to make them using plastic card and brick. The cast chimney pots should be sanded to get rid of flash and mould lines.

Notice Boards: Some lovely boards are supplied but I couldn't see how I could paint them convincingly. I made my own from plastic card & strip. Text was done with Powerpoint.
Conclusion: The kit makes up into a stunning building as Nigel Burkin said in his article. I'm not convinced that it's a good idea to cut and etch brick walls from wood. The mortar course depth isn't deep enough and, as I mentioned, the end wall detail is lost. Far better to use plastic for this.
Edit 10 March 2012
I have now weathered the building and photos follow:


John Kendall
No comments:
Post a Comment